FastPhotoReports uses the default printer driver to 'render' the report pages so that what you see is what you get (wysiwyg). Sometimes if the default printer is a network printer or wireless printer it can slow FastPhotoReports report view render time. If you experience long refresh times, you can try using other printers for the render device. We suggest using virtual printers which can help very fast rendering (such as 'MS print to PDF' or other PDF printer)
Click to set the default Font for the report. This will become the font that is used when the FastFormat button is clicked or when new blank comments or sections are created.


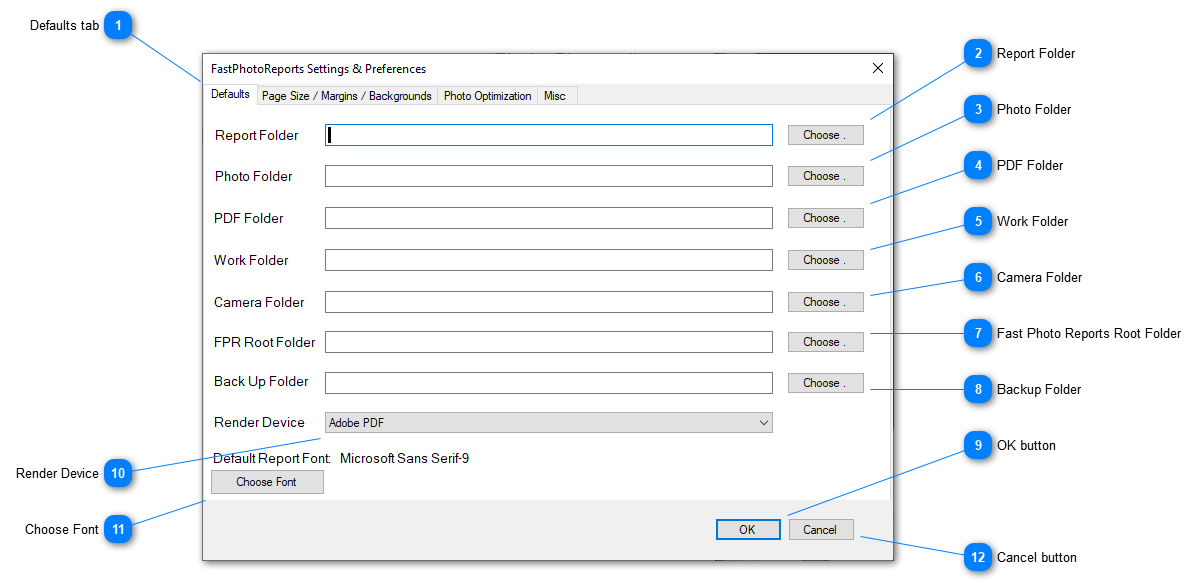


 and browse to select the folder that will be initially be shown when reports are saved.
 and browse to select the folder that will be initially be shown when browsing for photos.
 and browse to select the folder that will be initially be shown when PDF reports are saved.
 and browse to select the folder that will used for temporary files when a report is being edited.
 and browse to select the folder that will be initially be shown when the Insert Photo From Camera button is clicked.
 and browse to set the root folder for all of FastPhotoReport subfolders. (Advanced users only - suggest contact support)
 and browse to select the folder where backup reports will be saved. (Advanced users only - suggest contact support)




 is clicked or when new blank comments or sections are created.
