FastPhotoReports includes a text comment library to quickly add comments and content anywhere in your report. The comment library is accessed using the Comment Button (above) which will display the Comment Library Dialog.
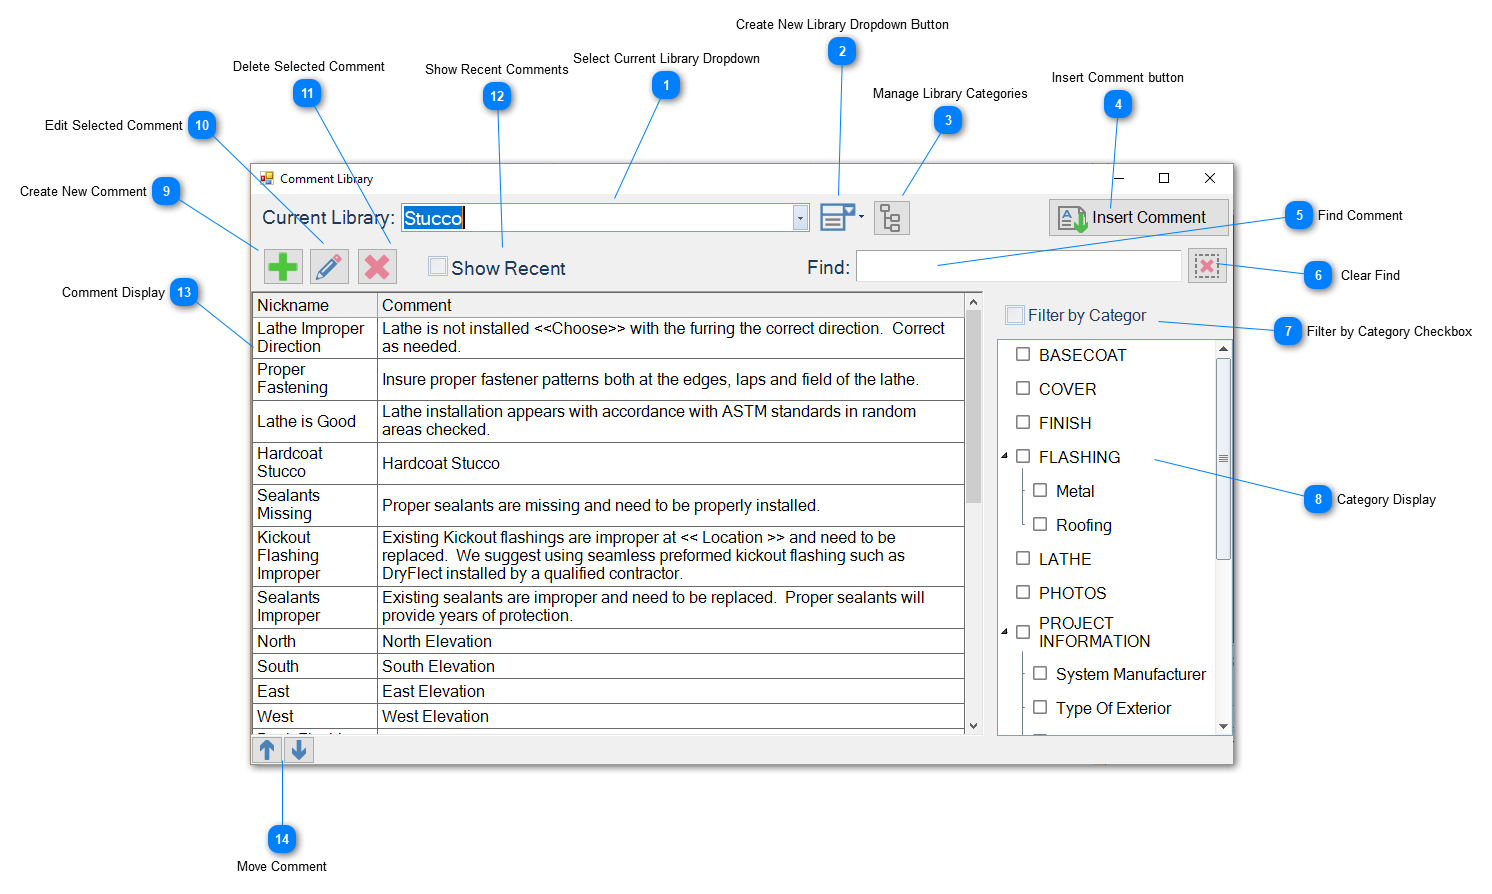
To Access the Comment Library click the Comments button located on both the simple and advanced text editors. Comments are always added to the current cursor location so click the cursor where desired first and then insert the comments. Below is an overview of the Comment Library Window and its functions:
Select Current Library Dropdown
Click the dropdown to select a comment library to use. If no lists exist, first click the create library button (item 2) to add new libraries or import libraries (advanced)
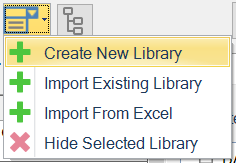
Click the Create new Library and you will be prompted to provide a name for the library. After a library is created you can select it in the current library dropdown list to add comments or to use.
Click the Manage Categories button to create, delete and edit the Current Libraries comment categories and sub-categories.
You can create categories and sub-categories to help organize Comment Libraries that contain large numbers of comments.
Once you have set up your categories and sub-categories you can tag any comment to one or more categories when creating or editing the comments.
Check the Filter by Category checkbox to only show comments from the categories checked in the Category Display (see items 7 & 8)
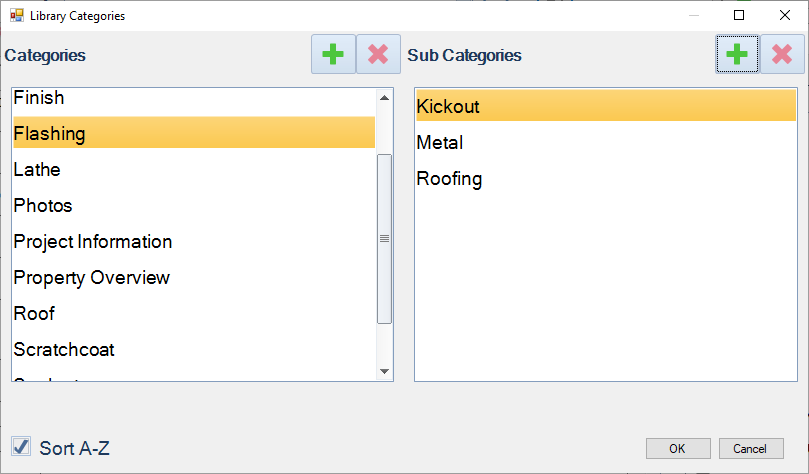
When you click the Manage Category Button, the following dialog will display:
Click the Plus to add categories and X to delete them. Note: Deleting a category or sub category will NOT delete any comments from your library, only the tag to the category. To create or display sub-categories first click a Category and the existing Sub-Categories will display or you can click the sub-category plus button to add a new sub-category to the currently selected Category.
To rename a category or sub-category right mouse click and choose rename:
Click the Insert Comment to insert the selected comment at the cursor location. Many comments can be added one behind another. The dialog can be minimized or closed when all comments have been added.
Click to filter the comment list to only items containing the text in the Find text box. This is great feature to quickly find comments with specific key words
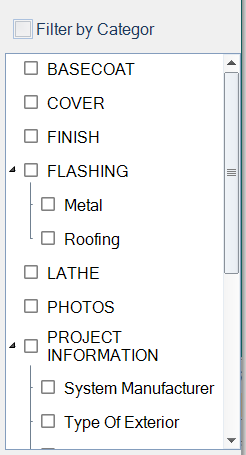
Display of the current comment library categories and sub-categories. When the Filter By Category checkbox has be checked you can display or hide comments from one or more categories by checking or unchecking the desired categories.
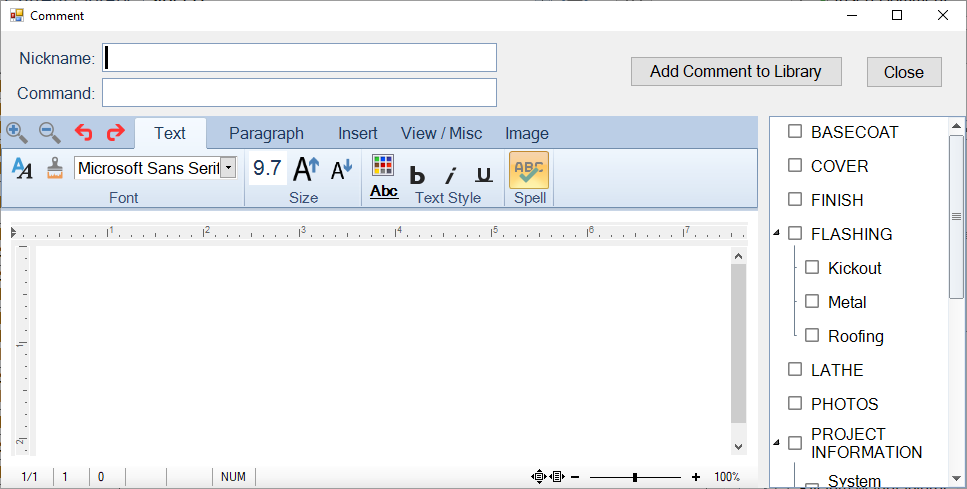
Click the Plus Button to create a new comment in the current library. The new comment dialog will display:
Type in a very short nickname for the comment (example Missing Sealant)
Type in the new comment text using the simple text editor provided. You can copy and paste to insert text from other sources. Use with care with pasting comments as unintended hidden formatting can accompany the text giving unexpected results. We suggest you first paste the text into Notepad which will remove all formatting and then copy/paste into the New Comment text editor. Keep in mind that dropdown lists and checkboxes can by part of a comment.
Check any of the Categories / Sub-categories you what to tag the comment to. You can check multiple categories to tag for any comment. The categories will only come into play if the Filter by Category option is checked otherwise they will always be displayed.
Add an optional command. The feature will execute a command when the comment is used (this feature is experimental). An example of using this feature would be that if a comment is used, then any comment(s) could be automatically added to other sections of the report - a summary section for example. Contact support for questions with this feature.
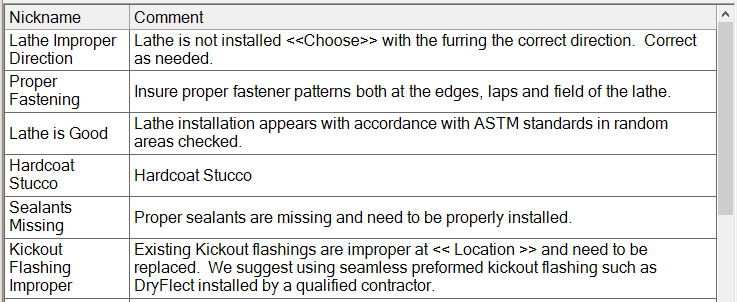
The comment list shows the available comments that can be inserted clicking on the comment and then clicking the Insert Comment button (item 4). The comment list will show the comment Nickname and then the comment (partial comment for long comments). The comment display will be filtered based on other options as Show Recent, Find, and Filter By Category options.


 To Access the Comment Library click the Comments button located on both the simple and advanced text editors. Comments are always added to the current cursor location so click the cursor where desired first and then insert the comments. Below is an overview of the Comment Library Window and its functions: